Many households brace for the rising cost of winter heating long before the season officially begins, especially when early cold snaps arrive.
People often focus on thermostats, energy providers, and other quick adjustments without realizing the biggest losses happen in places they rarely see.
Small structural gaps can silently drain warmth, pushing monthly bills higher with every degree of heat that escapes. This is why many homeowners are now looking upward instead of outward when trying to cut expenses.
Where most heat is actually disappearing
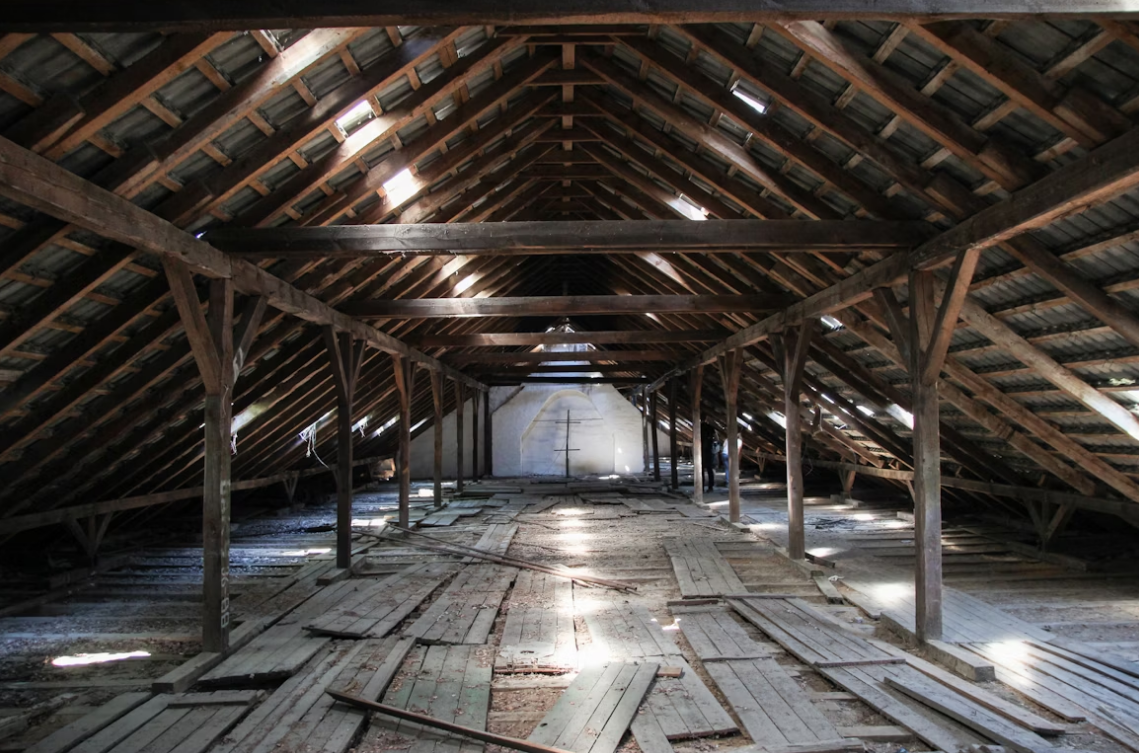
Experts say the “number one heat thief” in most homes is inadequate attic insulation, which allows warm air to slip through the roof with surprising speed.
Roofing specialists warn that heated air naturally rises, meaning a poorly insulated attic can behave like an open doorway.
Jeff Berzolla, CEO of Instant Roofer, explained, “Most people focus on turning down their thermostat or switching energy providers, but they’re missing the biggest culprit.”
He added, “Your roof and attic are like a chimney for your wallet: heat rises, and if there are gaps or poor insulation up there, you’re literally heating the neighborhood instead of your home.”
How better insulation protects your home and wallet
Berzolla revealed that simply updating or adding attic insulation can cut heat bills by up to $600 a year. He noted that inadequate attic insulation “is the number one heat thief” in most homes and that reducing heat loss by up to 25% is possible with proper upgrades.
Homeowners who make this change typically save between $300 and $600 annually, depending on the severity of their heat loss. For many people, this is one of the most cost-effective improvements they can make before winter sets in.
Also read: Simple ways to make your home feel cozy, comfortable, and uniquely yours
Why DIY insulation is more accessible than many expect
While blown-in insulation installation can cost $1,200 to $2,000 when done by a professional, it is possible to complete the project yourself for around $500.
Family Handyman explains that “blowing attic insulation isn’t hard, but it’s dusty, sweaty work,” making it an achievable weekend project for motivated homeowners.
They recommend enlisting a helper and reserving two full days to get the job done safely and thoroughly.
Their guide outlines essential steps such as sealing attic bypasses, installing vent chutes, insulating attic access points, marking insulation levels, and operating the blower machine.
Also read: Budget-friendly tricks to keep your home warmer without more heat
What you need to complete this DIY upgrade
Family Handyman lists several materials for the project, including caulk, cellulose insulation, duct tape, expanding foam, and vent chutes.
Recommended tools include a blower machine, caulk gun, dust mask, flashlight, hose, leather gloves, safety glasses, shop vacuum, stapler, trouble light, and a utility knife.
With preparation and proper safety gear, homeowners can significantly improve their attic insulation for a fraction of the professional price. Those wanting a step-by-step breakdown can find a detailed manual on Family Handyman’s website.
Read next:
- Homeowners can save up to $83 a year with this simple “weather strip” trick—and it works year-round
- Uncover the secret to flawless furniture painting–you're probably missing this crucial step!
As winter approaches, small improvements like this can make a noticeable difference in comfort and expenses throughout the season. Many homeowners are discovering that upgrading insulation is far more reachable than they once believed, especially with clear guides available. The potential savings often outweigh the effort, particularly in older homes that lack proper protection. What part of your home do you think loses the most heat, and have you ever considered tackling a project like this yourself?
The GrayVine
Latest Articles
-
 The 100 best restaurants in the US for 2025 are here—did your favorite make the list?
- Started by Nina Uy
- Replies: 0
-

-
Put the turkey baster down—these food chains have Thanksgiving covered!

- Started by Nina Uy
- Replies: 0
-
Thanksgiving guide: 15 open restaurants, 12 closed ones to know

- Started by Kathleen Talay
- Replies: 0
-
Clearer hearing starts with smarter choices—learn what matters before picking your OTC hearing aid
- Started by Nina Uy
- Replies: 0